Using Queues to Automatically Publish Posts in SocialBu
Learn how SocialBu queues work, queue limits by plan, team permissions, ways to add posts, scheduling options, and queue troubleshooting.
Written By Ghina Rehman
Last updated 6 days ago
Queues help you publish posts on a recurring schedule without choosing a separate date and time for every post. You create a queue, choose the social accounts and publishing slots for that queue, then add posts to it. SocialBu publishes the queue items one by one according to the queue schedule.
When to use a queue
Use a queue when you want posts to go out regularly at fixed weekly or monthly time slots.
Use a queue when you have evergreen content that can continue publishing through the same schedule.
Use a queue when you want to add posts quickly without manually selecting a date and time for each one.
Before you start
Make sure the social accounts you want to publish to are connected in SocialBu.
If you are working inside a team, make sure you have the right queue permissions for that team.
Queue limits depend on your plan. If your account or team reaches its queue limit, SocialBu may ask you to upgrade before you can create or enable another queue.
Queue limits by plan
Current public plan queue limits are:
Free: 1 queue
Starter: 0 queues
Growth: 10 queues
Agency: 30 queues
Legacy, lifetime, or custom plans can have different limits. Check your Billing settings if the limit shown in your account is different from the public pricing page. For a broader plan comparison, see SocialBu subscription plans, limits, and features.
Team queue permissions
Team queues use team permissions. Depending on your role, you may need one or more of these permissions:
Create queues: create a queue for the team.
Manage queues: edit queue settings, enable or disable queues, reorder posts, shuffle posts, clean up posts, or delete queues.
Add posts to queues: add, edit, or remove posts inside a team queue.
If you cannot create, edit, or add content to a team queue, ask the team owner or an admin to review your permissions. For team automation permission details, see Team Automations and Permissions.
Create a queue
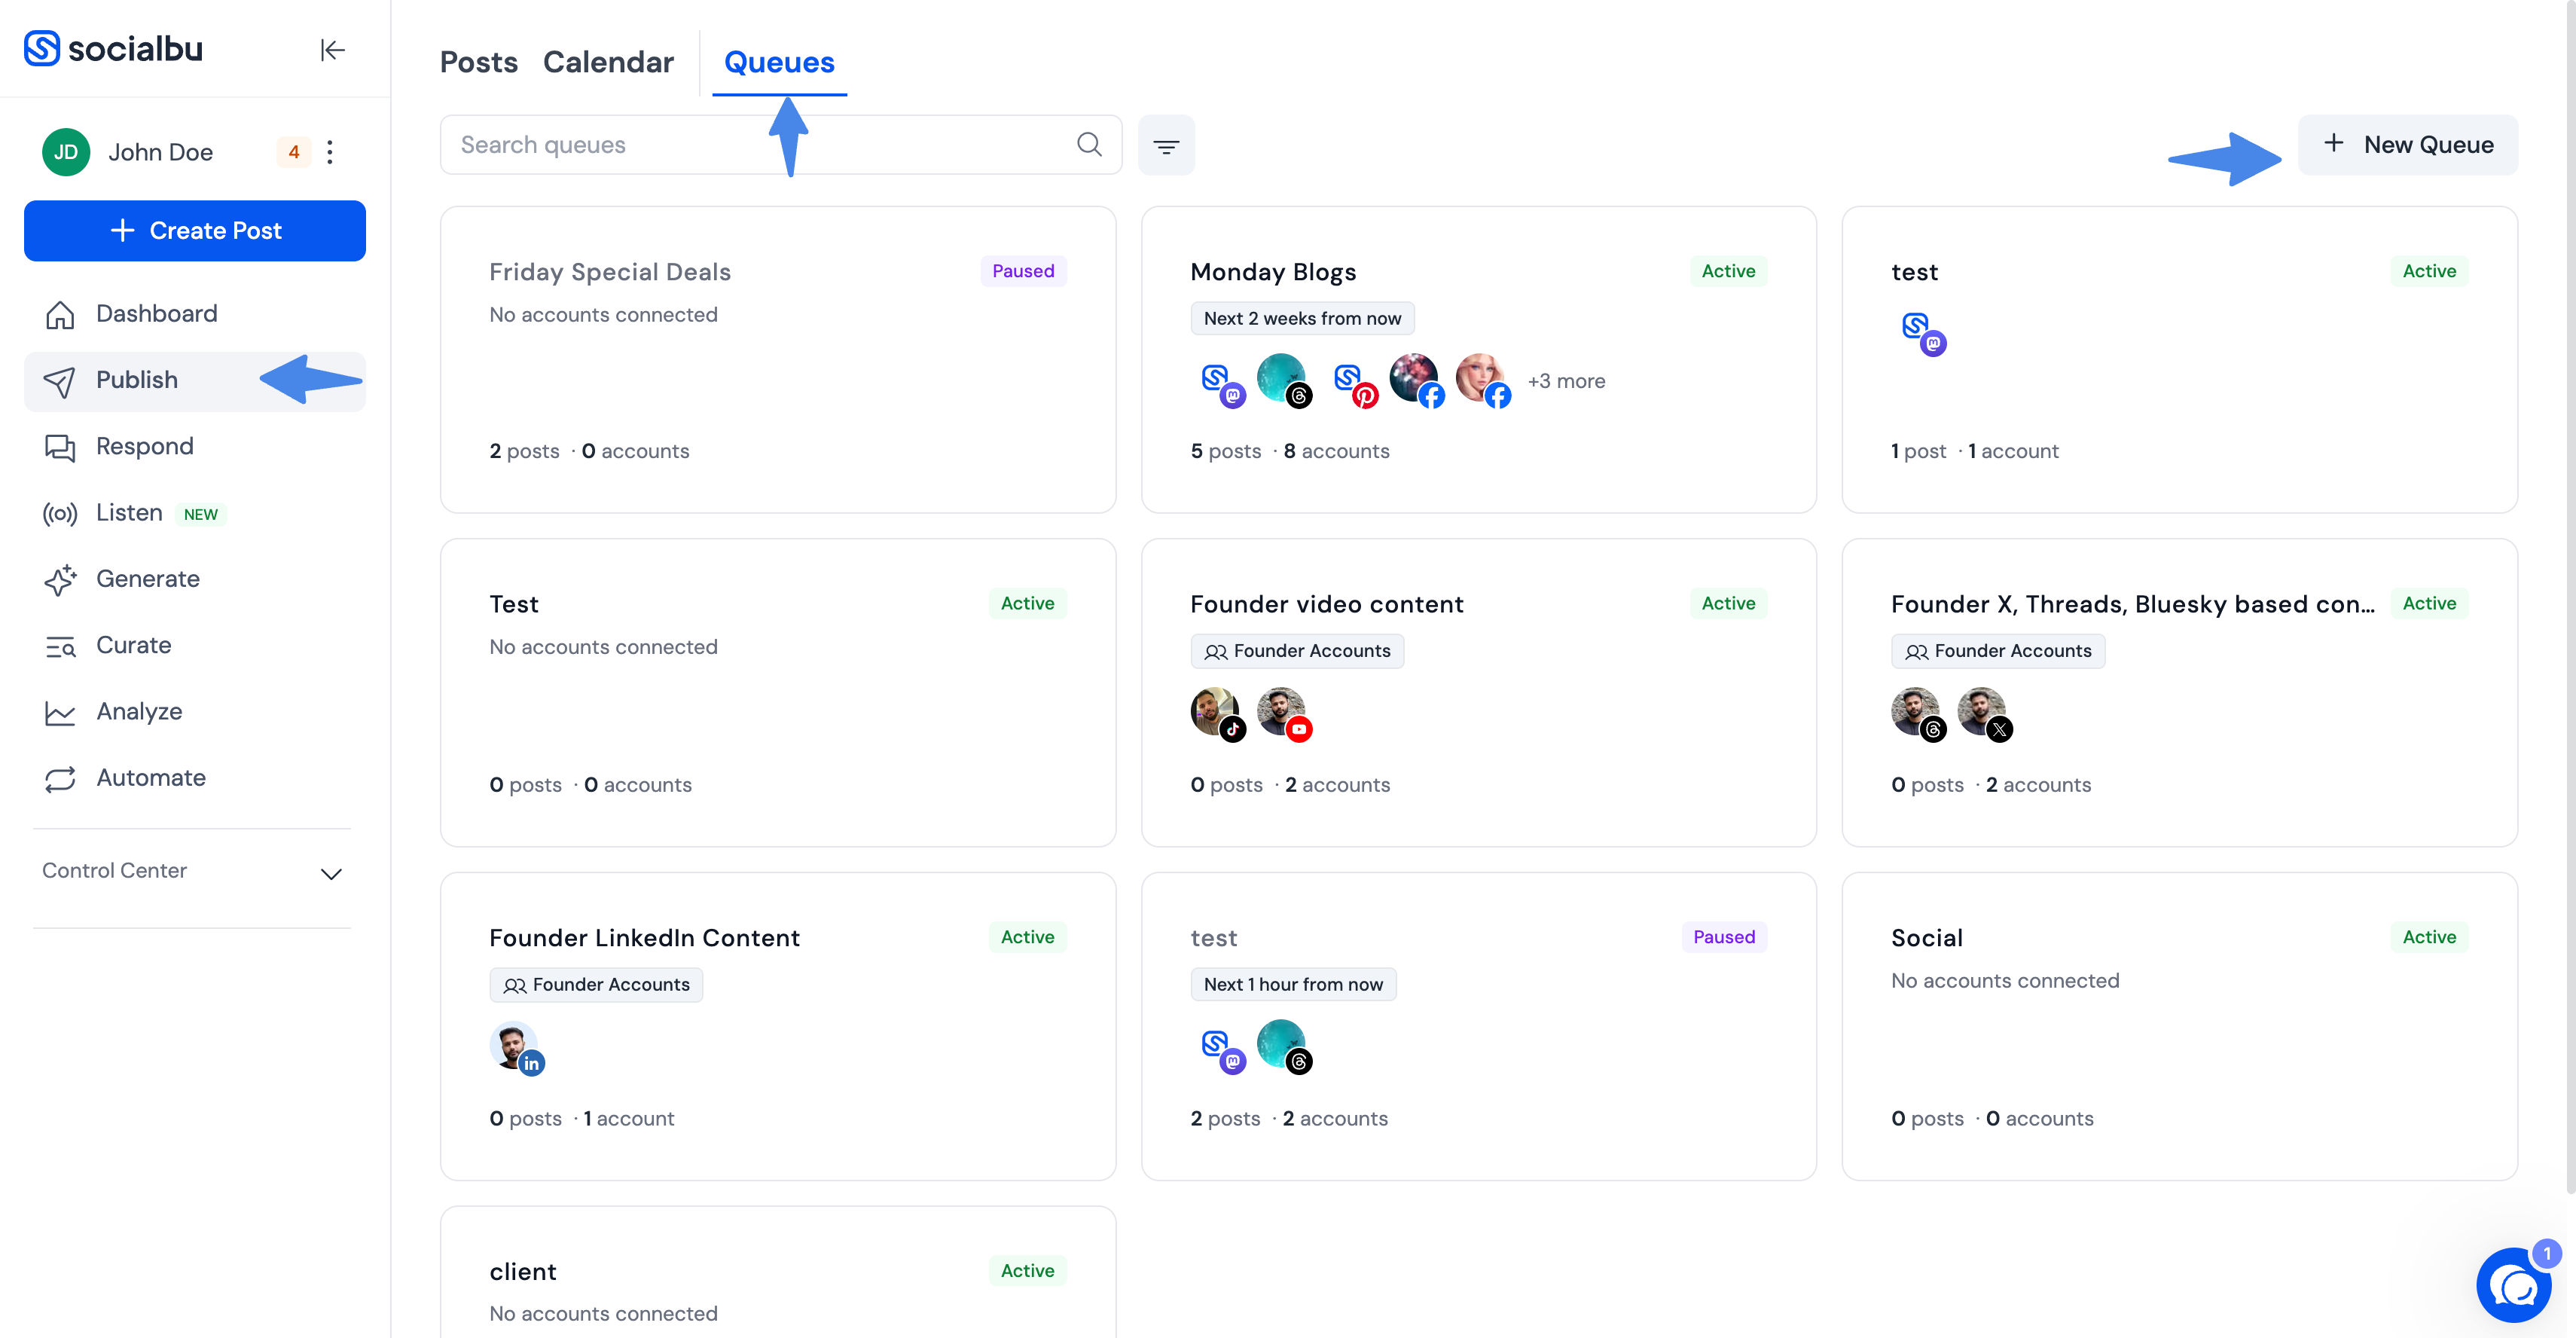
Go to Publish > Queues.
Click New Queue.
Enter a queue name.
If you use teams, choose the team the queue belongs to.
Open the queue settings.
Choose how many times each post should publish. Leave the field blank if queue posts should keep cycling without a fixed publish-count limit.
Select the accounts that should publish from the queue.
Add at least one publishing schedule.
Choose whether the queue should be active.
Save the queue.

Queue schedule options
Weekly schedule: choose one or more weekdays and a publishing time.
Monthly schedule: choose one or more dates of the month and a publishing time. You can also choose specific months, or leave months unset to use all months.
Start and end dates: use these when the queue should run only during a specific date range. The start date must be before the end date.
Publish count: choose how many times each queue post should publish. When a queue post reaches that count, SocialBu removes it from the queue.
Disable queue on post failure: if this option is enabled, SocialBu disables the queue when a queued post fails. If it is not enabled, SocialBu sends a failure notification and the queue can continue processing future posts.
Ways to add posts to a queue
Post Composer: use Save to Queue from the Schedule dropdown when creating a post.
Bulk Import: upload queue posts from a CSV file when you need to add many posts at once. See Add Posts to a Queue with Bulk Import.
Automations: use an automation action to add content to a queue when a supported automation trigger runs. See Complete Guide to SocialBu Automations.
API or MCP: use SocialBu API/MCP queue tools when your workflow creates queue posts programmatically. See How to use SocialBu via Claude (MCP Integration).
Add a post to a queue from the composer
Create your post from the Post Composer.
Add the caption, media, and account-specific options needed for the selected accounts.
Click the dropdown next to Schedule.
Select Save to Queue.
In the Add to Queue window, select one or more queues.
Click Save.
If no queues are available, create a queue first from Publish > Queues.
Add posts with Bulk Import
You can also add many posts to a queue from a CSV file. See Add Posts to a Queue with Bulk Import.
Add queue posts with Automations, API, or MCP
Queues can also receive posts from automation and developer workflows. Automations include an Add post to queue action, and SocialBu API/MCP workflows can add content to custom publishing queues. These options are best for repeatable workflows where another trigger or tool prepares the content before it enters the queue. Learn more in Complete Guide to SocialBu Automations and How to use SocialBu via Claude (MCP Integration).
Manage posts inside a queue
Open a queue to view the posts inside it.
Use the order field or drag handle to change the publishing order.
Use Edit to update a queue post.
Use Delete on a post to remove that post from the queue.
Use Shuffle Posts from the queue settings menu to randomize the post order.
If a cleanup option appears, use it to remove queue posts that have already reached the selected publish-count limit.
Pause, resume, or delete a queue
Use the active/inactive toggle on the queue page to pause or resume publishing.
Use the queue settings menu to delete a queue you no longer need.
If you only need to stop publishing temporarily, pause the queue instead of deleting it.
Queue troubleshooting
If a queue does not publish as expected, check these common causes first.
The queue is inactive
Open the queue and check the active/inactive toggle near the queue settings. An inactive queue will not publish until you enable it again.
The queue has no posts
A queue needs at least one post before SocialBu can publish from it. Add a post from the composer, Bulk Import, automation, API, or MCP workflow.
No accounts are selected
Open the queue settings and confirm that at least one valid social account is selected. SocialBu requires a queue to have selected accounts before it can publish queue posts.
An account is disconnected or unavailable
If a selected account is disconnected, removed, or no longer available to the team, the queue may fail for that account. Reconnect the account or update the queue settings to use available accounts.
The schedule is missing or invalid
Each queue needs at least one valid weekly or monthly schedule. Check that the schedule includes days or dates and a publishing time.
The start or end date is blocking publishing
If a queue has a future start date, it will not publish until that date arrives. If the end date has passed, the queue will stop publishing until you update or remove the date range.
The post fails platform validation
A queue post can fail if the content, media, or account-specific options do not meet the selected platform's publishing rules. Review the failed post, update the content or media, and save it again.
The queue was disabled after a failure
If Disable queue on post failure is enabled, SocialBu disables the queue when a queued post fails. You can review the failure notification, fix the issue, then enable the queue again.
You reached a queue limit
If your plan or team has reached its queue limit, SocialBu may prevent you from creating or enabling additional queues. Check your Billing settings or remove unused queues.
Need more help? Contact us at support@socialbu.com.